This guide explains how to deploy DefensX on macOS devices managed through Microsoft Intune. The process involves installing the DefensX Agent by a script, applying configuration profiles, and deploying the DefensX CA certificate.
Deploying DefensX via Intune managed Mac computers can be done in 3 steps.
Sign in to the Microsoft Intune Portal and navigate to Devices → macOS → Scripts
Click on the + Add button
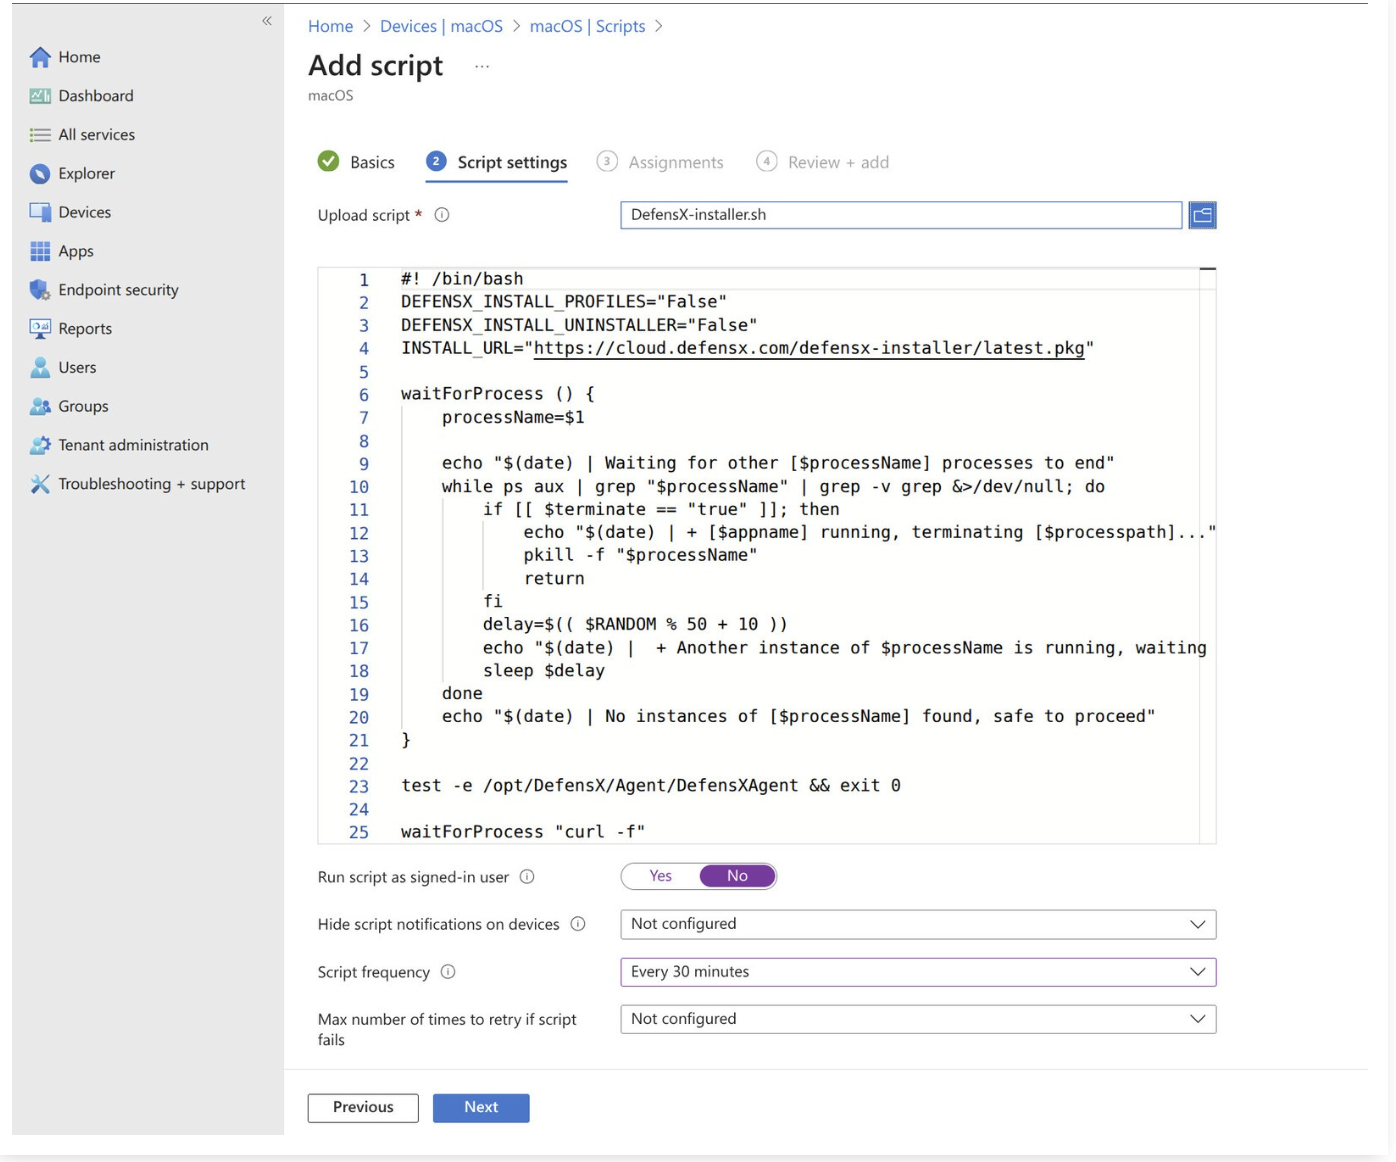
Enter DefensX Installer as the script name, then click Next
Upload the previously downloaded DefensX-installer.sh.
Configure the script:
Run script as signed-in user: Select No
Script frequency: Choose as required
Assign the script to the appropriate devices or user groups.
Review the configuration and click Add to complete.
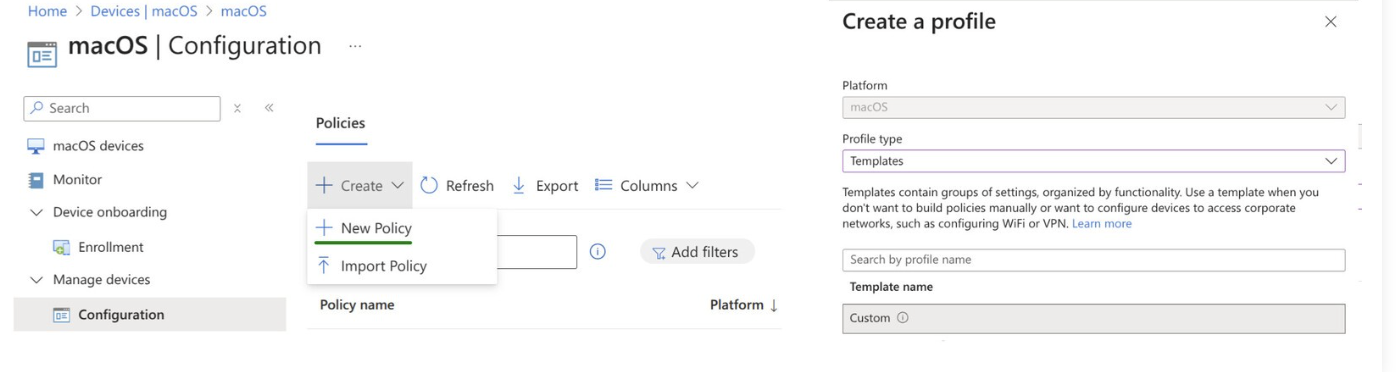
In the Intune Portal, go to Devices → macOS → Configuration.
Under Policies, click Create and select + New Policy.
In Profile type, select Templates → Custom, then click Create.
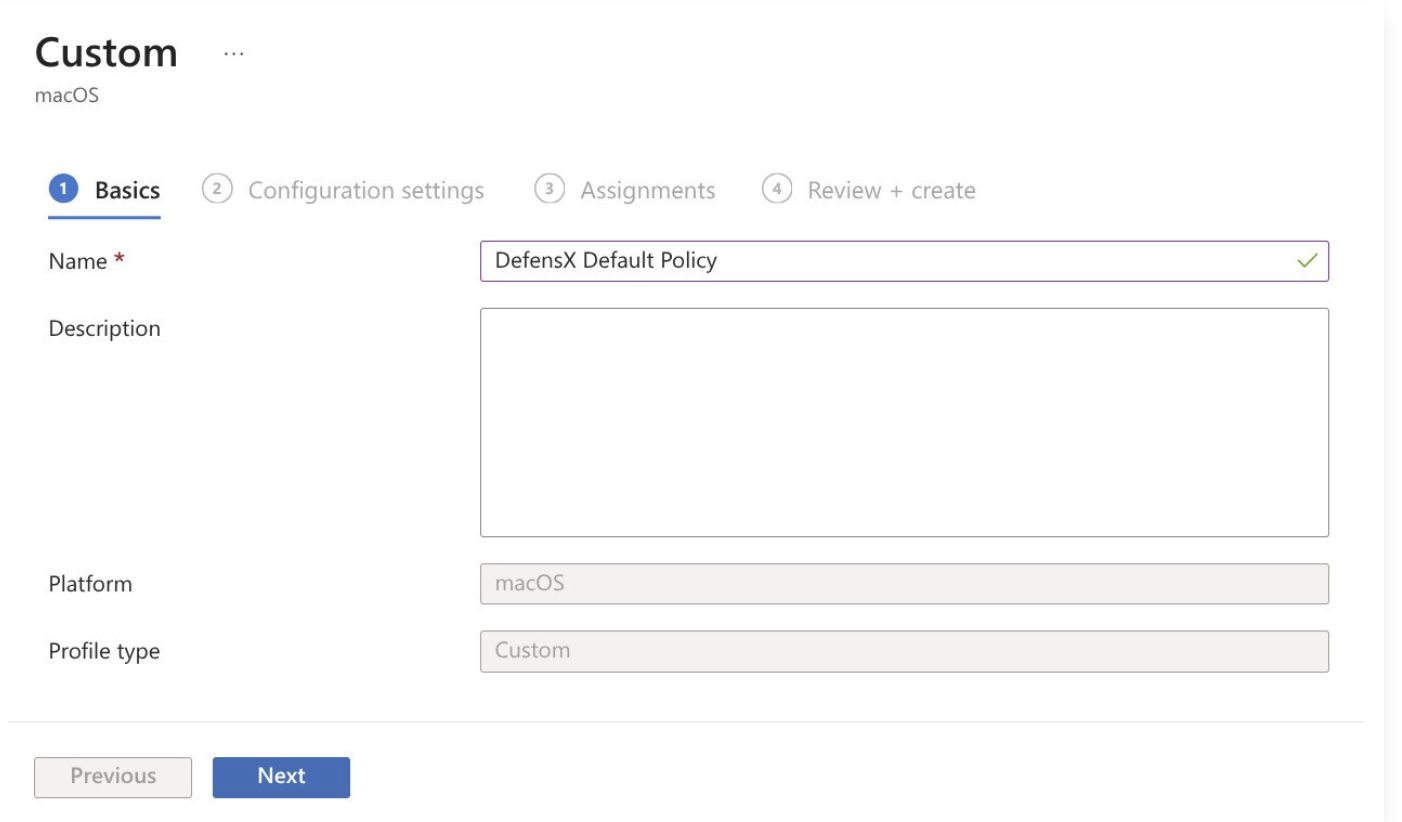
Enter a descriptive name such as “DefensX Default Policy”, then click Next
Assign the policy to the relevant devices or user groups.
Review and click Create.
The DefensX-CA certificate is required to properly render HTTPS block pages in browsers that do not use the DefensX extension or standalone clients.
In the Intune Portal, go to Devices → macOS → Configuration.
Click Create → New Policy
Select Templates → Trusted certificate, then click Create.
Enter “DefensX CA Certificate” as the profile name.
Set Deployment Channel to Device Channel.
Upload the DefensXCAlocalhost.crt file (downloaded earlier).

Assign to the required devices or user groups. *Review and click Create.
DefensX Agent installer is a regular MSI package that you can deploy through Intune and can be customized by environment variables like deployment key or some additional settings.
Required steps for deploying DefensX via Intune:
Add a new Line-of-business app
Upload the MSI file to the newly created app
Put environment variables to be used on installation
Attach newly created application to some device groups
Login to Intune Management Portal go to Apps → Windows menu and click on the + Add button.
On the App type selection box select Line-of-business app under the Other section and click on the Select button.

In this step click on the Select app package file link and upload the DefensX Agent Installer msi file (which has been attached in the email) and click OK button.
In this step, enter the following items;
Key Value
Name | DefensX Agent |
Description | DefensX Agent |
Publisher | Secure Industries |
Ignore app version | Yes (it is required for the applications which have their update mechanism) |
Command-line arguments | Copy your deployment variables in |
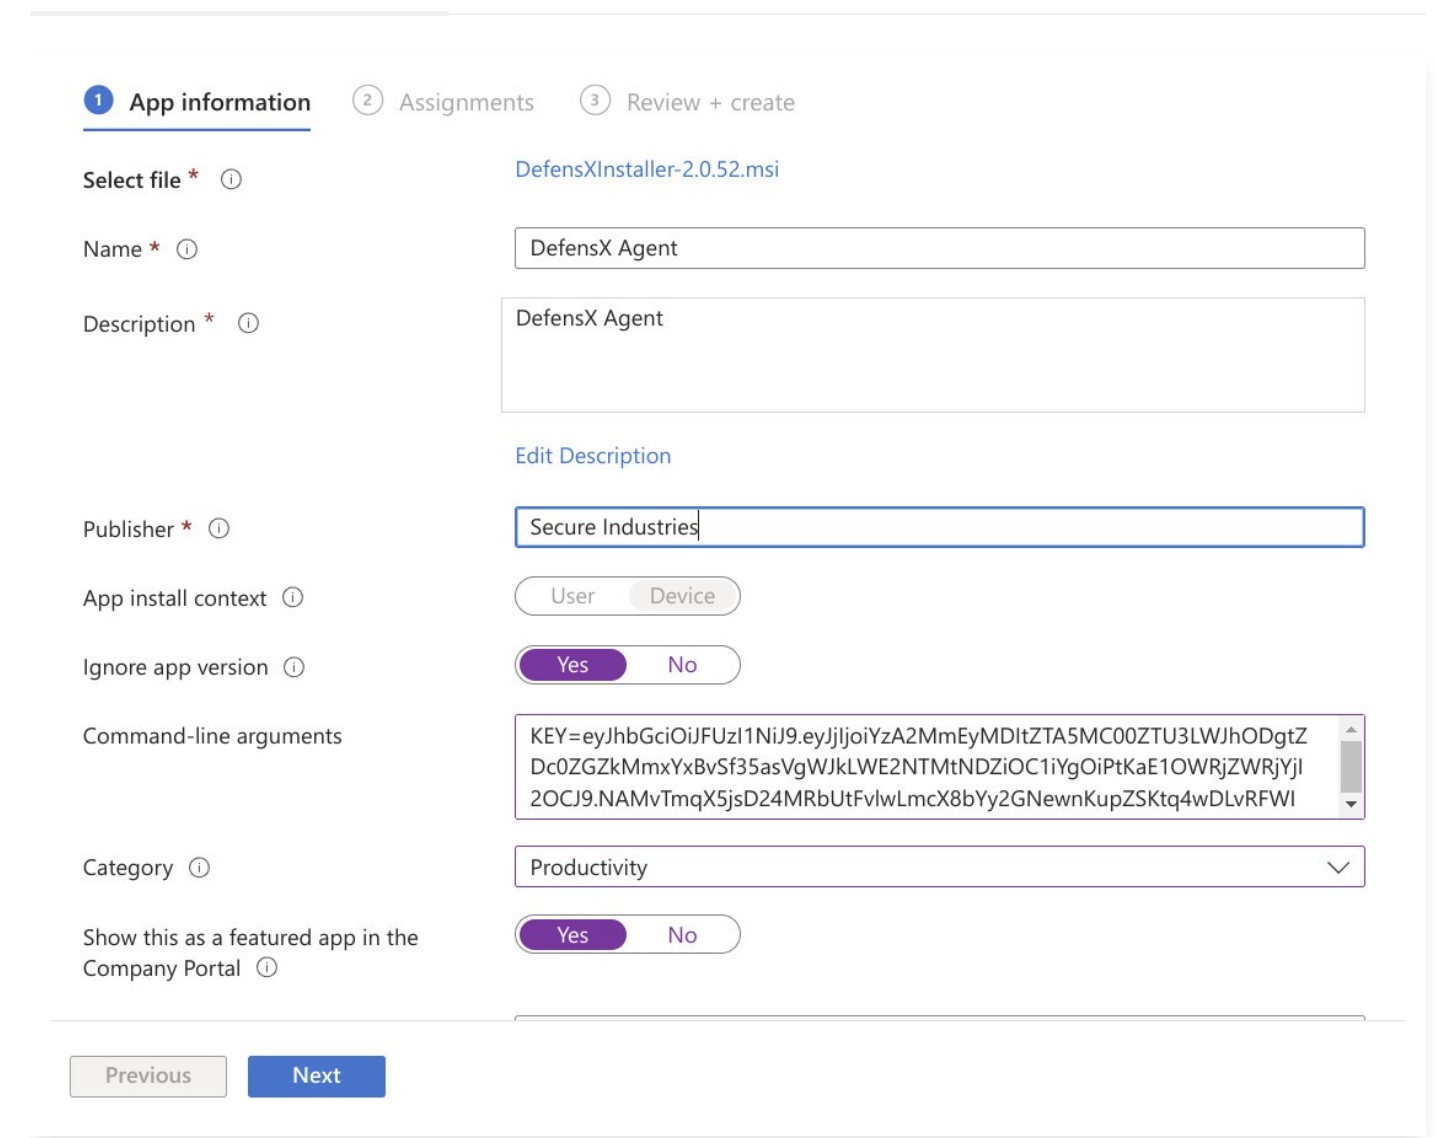
Caution | You should double-check the Ignore app version setting and make sure that it is selected as Yes. If it is not, upon a newer DefensX Agent release, Intune will try to reinstall the older version which will create a conflict. It is a general rule to select this option as Yes for Windows apps with self-updating installers (such as Google Chrome). |
In this step, you can attach some groups (or the virtual group of All devices to install it all the devices) to the application as Required.
Once everything is selected click the Next button and finalize the application creation process.
After your devices start to run the Intune sync process, DefensX Agent will be installed and started to run.
